
Rubber t Moulding is used to finish the edges of many items. It typically has a rounded or flat surface and the ‘t’ goes into a slot in the edge of the item. It can be º’ to 1′ wide. The width of it is determined by the width of the edge of the item. The width of the rubber t moulding should be the same as the depth of the item. It lines up on the edge without having a lip around the item.
Rubber t moulding can be seen in a number of places.
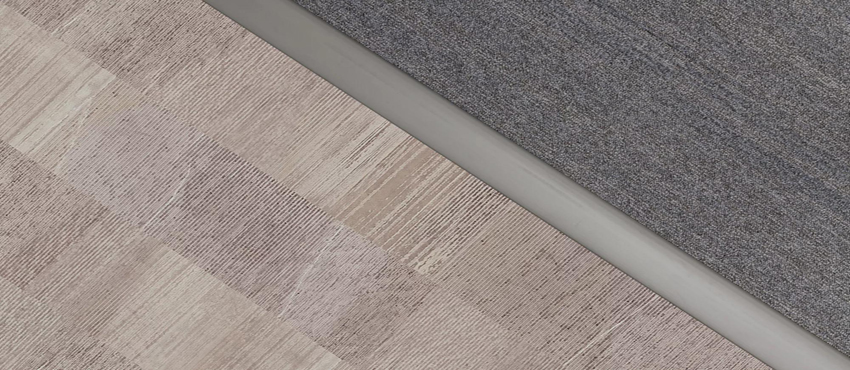
We see it every day on the edges of boats, countertops, tables, video games (especially the wooden ones at the arcade), tables of all kinds, and slot machines. It can also be used in doorways. When one type of flooring is ending and another is beginning, rubber t moulding can be put there to even out the transition and hide the small gap that always exists.
The most common shapes that are used are crescent (which has a small rounded dome shape) and flat (which is still rounded, but stands up less than the crescent). These are only the most common. There are numerous other shapes that rubber t moulding can be purchased in. Some examples of these shapes are rippled, bull nosed, work surface, water fall, flipper door, and wedge. The shape and size needed depend on the job being completed.
This is fairly inexpensive. It comes in coils that unroll to cover the edges of the items. The coils can be purchased in 20 to 250 feet lengths, depending on the size of the job. There is also a rainbow of colors available, although glossy black is the most common. The flexible one can be bought in glossy or matte finishes. Again, all the variables depend on the consumer and the job.
When installing rubber T-moulding, the consumer (or builder or carpenter) only needs to gather the rubber T-moulding, some adhesive, a rubber mallet, a drill with a slot bit, and, of course, the item being finished. The consumer will then create a slot in the edge of the item (going all the way around in the middle of the side). Next, they apply adhesive to the item. Depending on the adhesive used, some time may be needed for it to dry slightly to increase tackiness. Once the adhesive is ready, the ‘T’ of the rubber T-moulding is securely inserted into the slot. The rubber mallet is used if a tighter fit is required or desired. After placing the rubber moulding, it should be allowed to dry completely before the item is ready to use.
Rubber T-moulding offers an inexpensive and flexible way to finish furniture, games, or countertops. It can be used both indoors and outdoors, although it is primarily used indoors. There is a wide variety of sizes, shapes, and colors of rubber T-moulding available for consumers to choose from to complete their projects.